Need to send the same email to your team, board members, or a group of clients? Instead of typing each address every time, you can create a contact group (also called a distribution list) in Roundcube Webmail. Once set up, just type the group name and everyone receives your message.
Creating a New Contact Group
Contact groups live in your Contacts area. Here's how to create one:
- Open Contacts — Click the Contacts icon in the left sidebar of Roundcube.
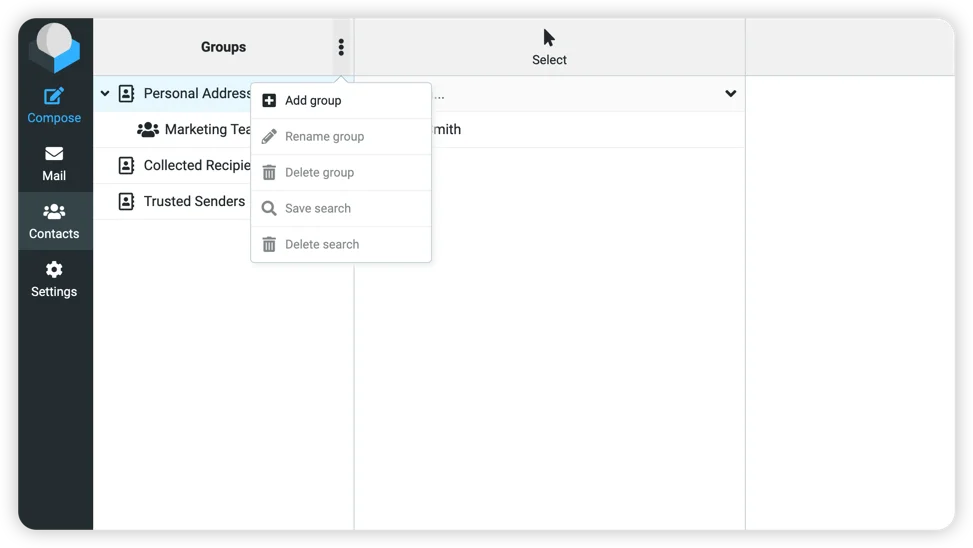
- Open the Groups menu — Click the three-dot menu (⋮) next to "Groups" at the top of the left panel.
- Select "Add group" — A dialog will appear asking for the group name.
- Name your group — Enter a descriptive name like "Marketing Team" or "Board of Directors."
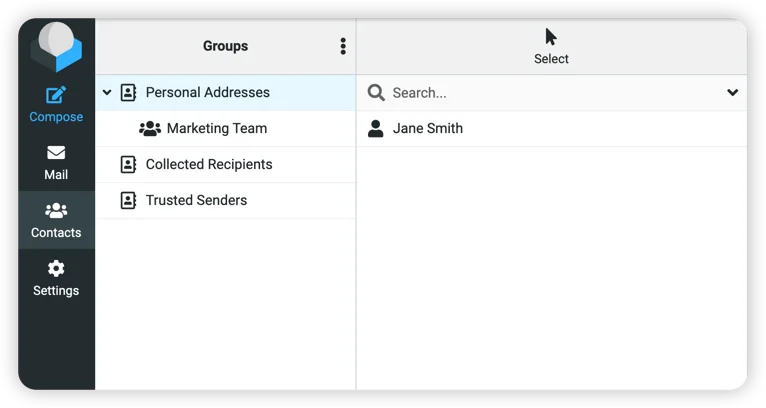
- Click Save — Your new group appears in the sidebar under Personal Addresses.

Adding Contacts to Your Group
Before you can add contacts to a group, those contacts need to exist in your address book. If you're starting fresh:
- Create your contacts first — Click the Create button in the toolbar, fill in the name and email address, then click Save.
- Drag contacts to the group — Once you have contacts in your list, simply drag them onto the group name in the left sidebar.
You can also add contacts while viewing the group: click on the group name, then use the Create button to add a new contact directly to that group.
Using Your Contact Group
When composing an email, start typing your group name in the To, Cc, or Bcc field. Roundcube will suggest the group—select it, and all members will receive your message.
Tip: Use the Bcc field if you don't want recipients to see each other's email addresses. This is especially useful for client communications or newsletters.
Managing Your Groups
To rename or delete a group, click the three-dot menu (⋮) next to "Groups" and select the appropriate option. Note that deleting a group doesn't delete the contacts—they remain in your address book.
Common Uses for Contact Groups
- Team communication — Group your staff by department for quick internal updates
- Client segments — Create groups for different client types or projects
- Recurring recipients — Group people you regularly email together (vendors, partners, committee members)
- Event planning — Temporary groups for event attendees or volunteers
Need Help Setting This Up?
If you'd prefer not to set up contact groups yourself, or if you need help organizing a large number of contacts, we're happy to assist. We can create groups, import contact lists, or walk you through the process over a quick call.
Questions? Contact us at support [at] webops [dot] host or submit a support ticket. Our team is available 9am-5pm, 7 days a week (24/7 for emergencies).
