It’s easy to set up a professional email address with WebOps Hosting—no technical skills required! Follow these steps:
- Add a New Email Account
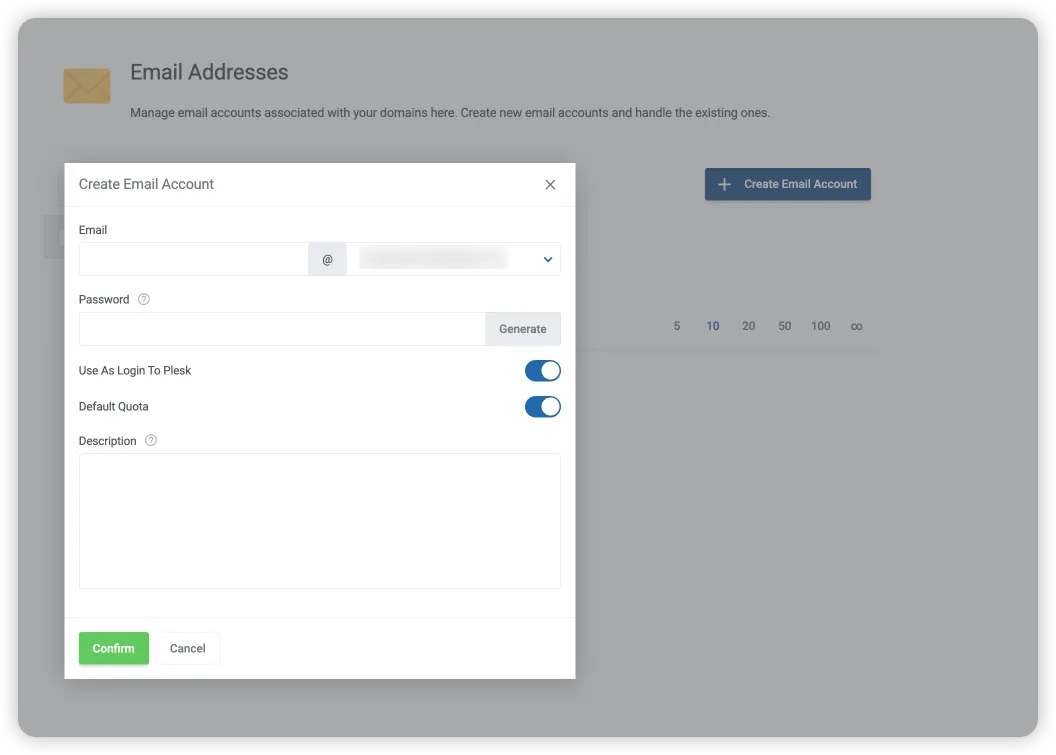
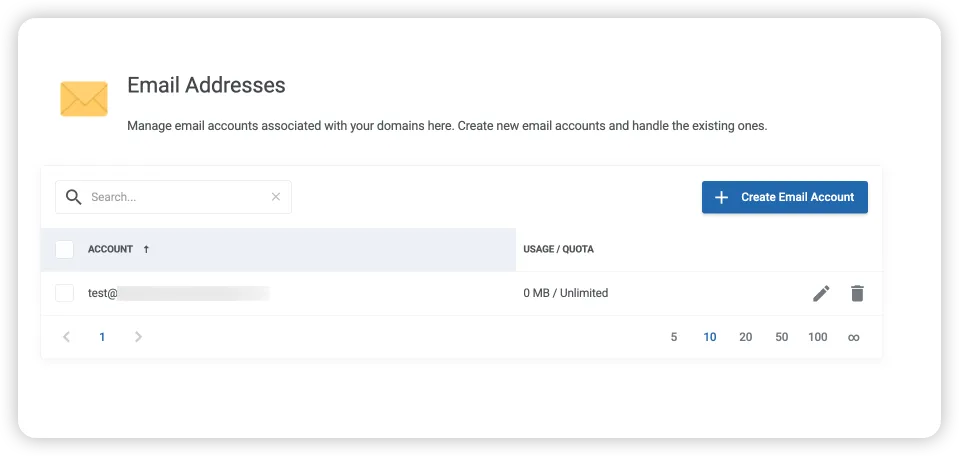
- Click the "Add Email Account" button on the Email Addresses page
- Fill out the form to choose your email address, domain, password, and storage quota

- Fill in Your Email Details
- Email Address: Enter the part before @ (e.g., john for john@yourdomain.com)
- Domain: Select from your available domain(s)
- Password: Use a strong, unique password. The "Generate Password" button can help.
- Quota: Choose Unlimited (recommended), or set a custom limit
Pro Tip: Avoid creating "info@" addresses to reduce spam. Consider "hello@", "contact@", "support@", or your own name.
- Complete Email Creation
- Click "Create Account" (or "Add Email Account")
- You’ll see a success message, and your new address will appear in the list

- Save Your Password Securely
- Write down your password or add it to a password manager
- If forgotten, you can reset it anytime from your client area
Want multiple addresses for your team or departments? Repeat these steps—unlimited accounts are included!
Call to Action
Don’t want to set this up yourself? We’re happy to do it for you! Just request help with new accounts and our support team will handle the details:
- Email: support [at] webops [dot] host
- Support ticket system: Submit a ticket
Support hours: 9am–5pm daily and 24/7 for emergencies. We love helping with email!


